My workshop does not have a/c, and it gets quite hot while I’m working. I utilized to blow a fan straight at myself, however it absorbed dust from around the store and blew it at me.
 Household Handyman
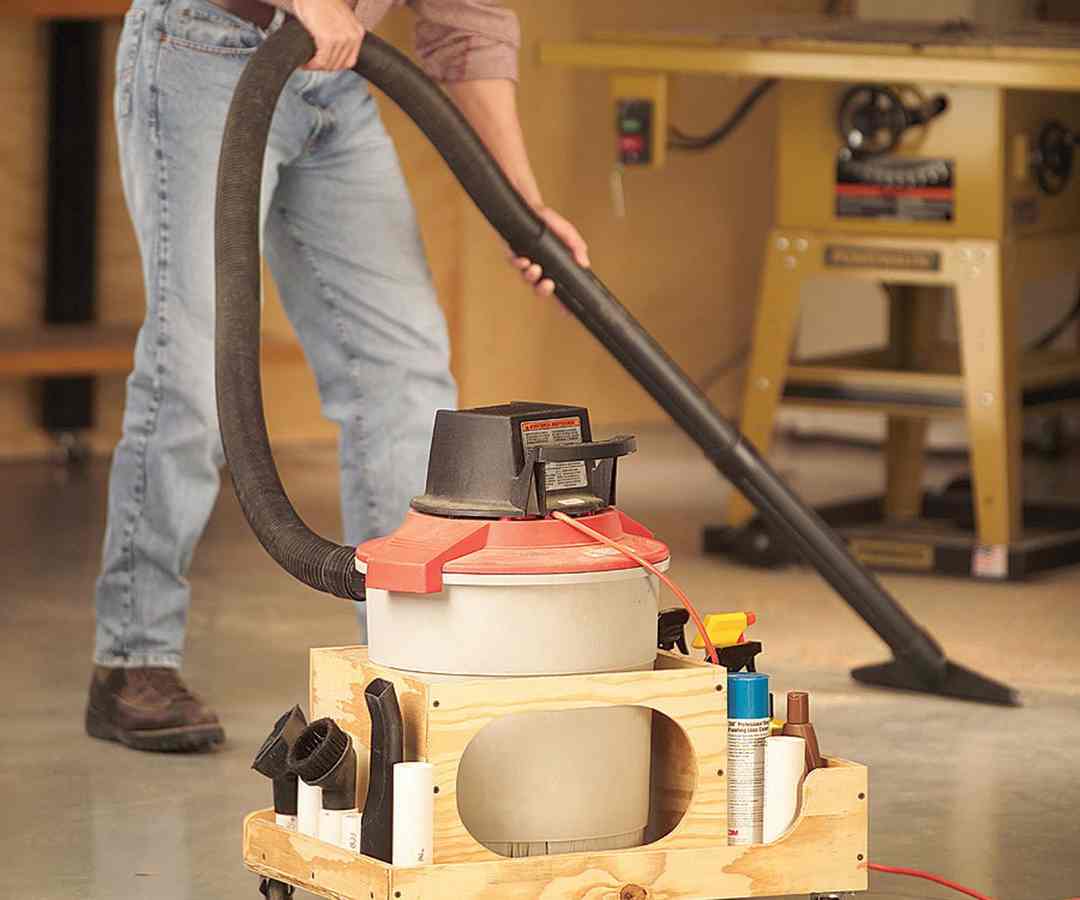
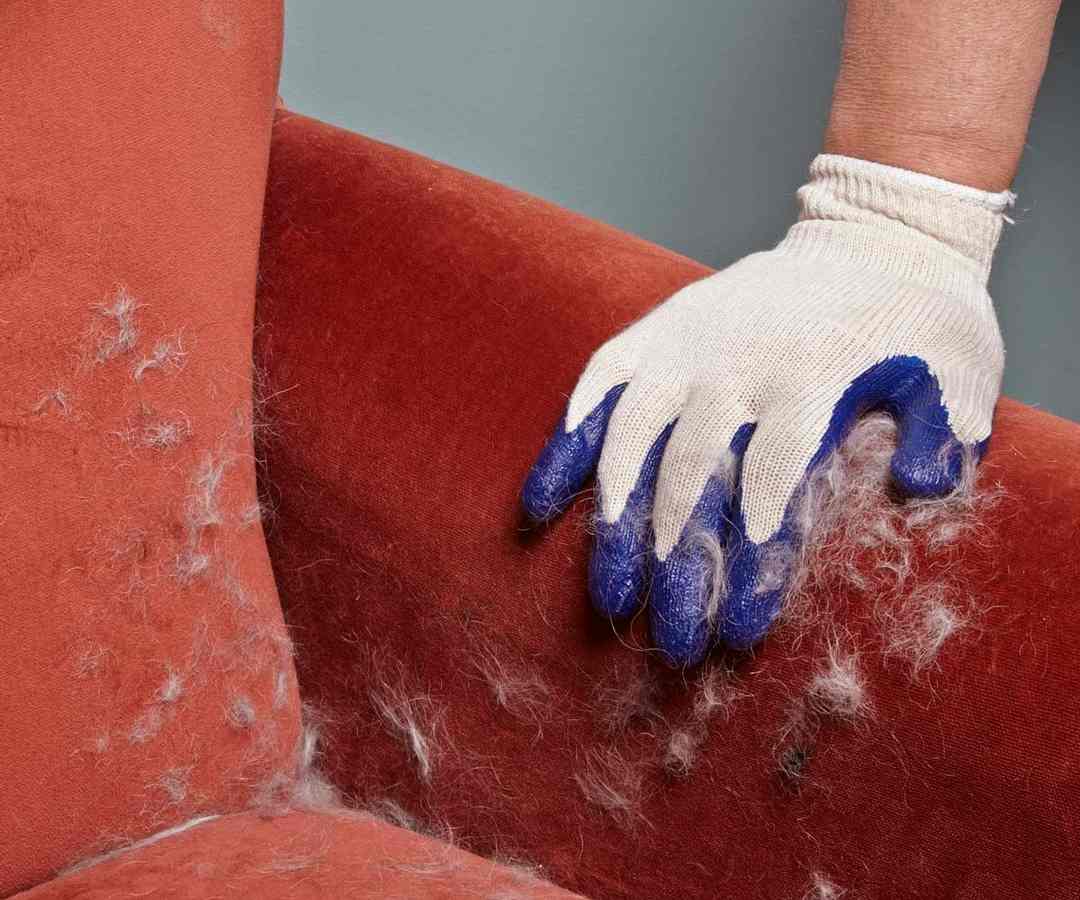
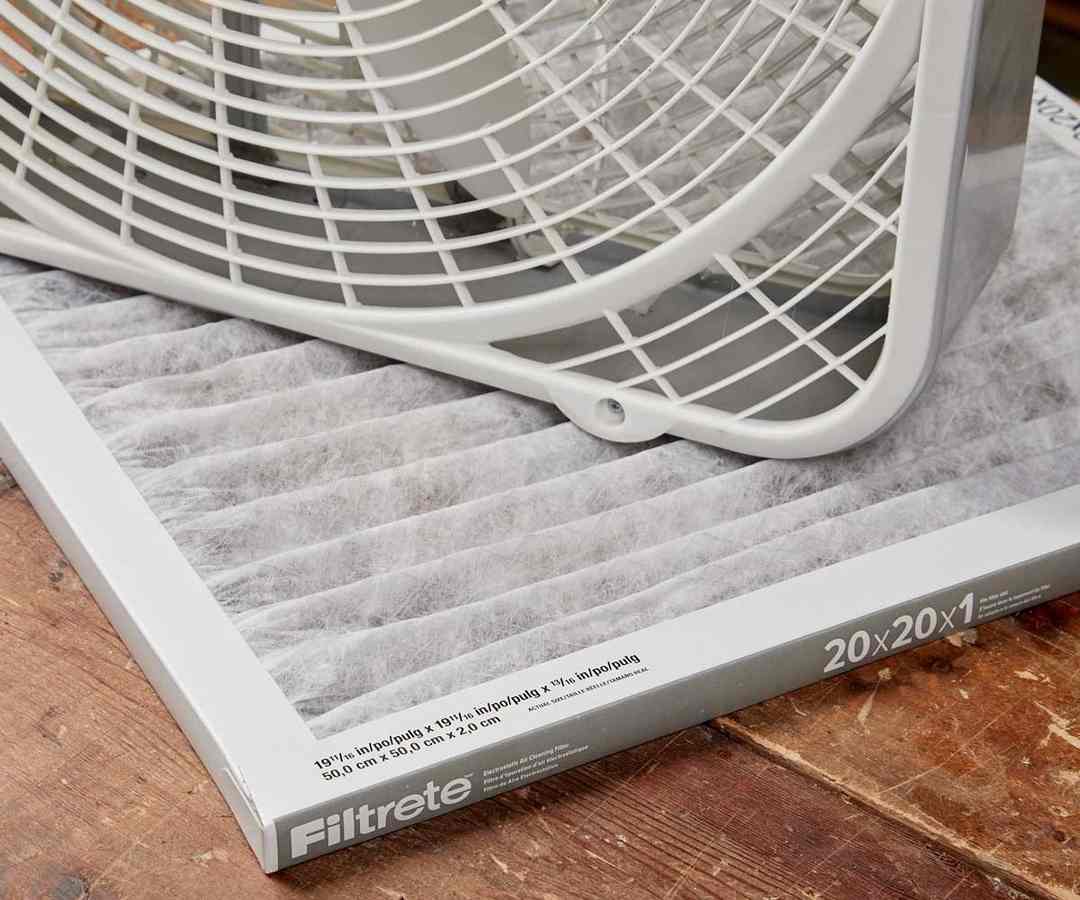
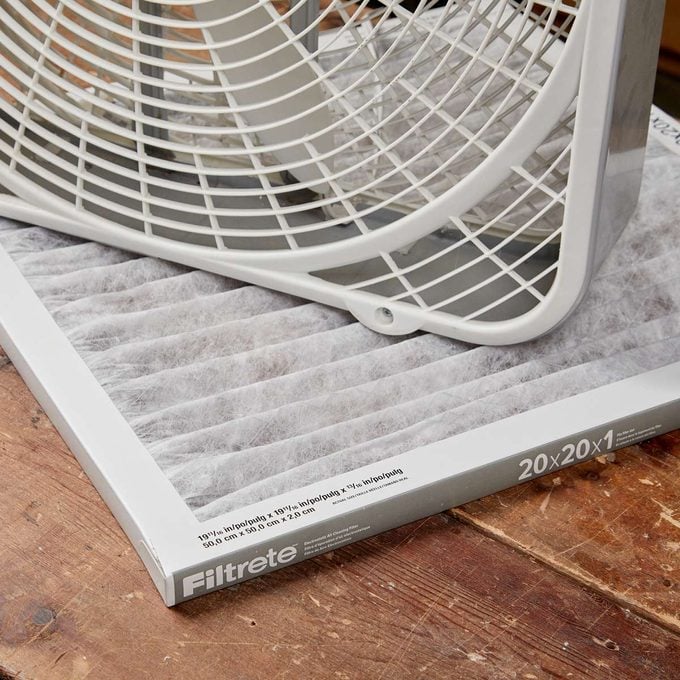
Saw Dust Filter Fan
My workshop does not have a/c, and it gets quite hot while I’m working. I utilized to blow a fan straight at myself, however it absorbed dust from around the store and blew it at me. I had a couple of additional heater filters lying around, so I attempted connecting one to the back of the fan utilizing hook-and-loop fasteners. This made a substantial distinction! Do not utilize a super-high-performance filter, as it might trigger the fan to need to work too tough to pull air through, leading to an overheated motor.– Larry Brannock
These 34 unbelievable ideas will assist you finish your woodworking tasks quicker and much better than ever prior to!
 Household Handyman
Here are 47 more useful tips for your worksho: 1/ 47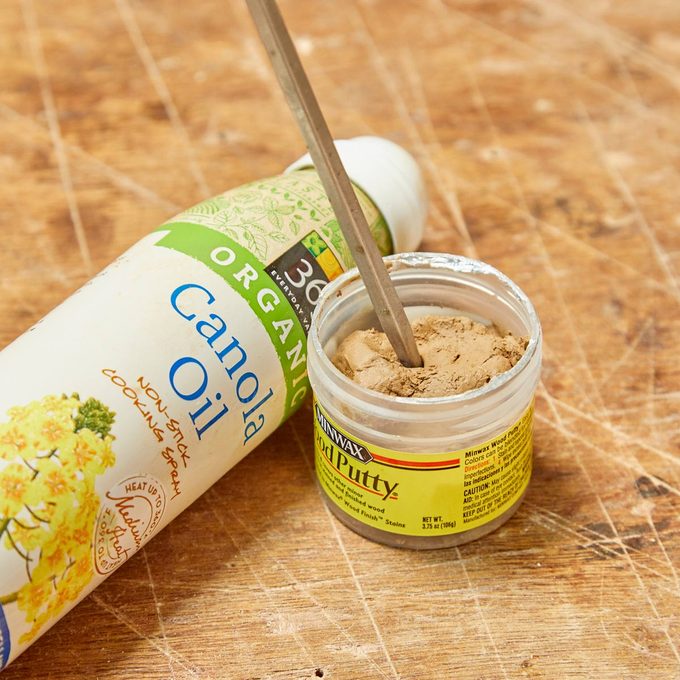
Revitalize Dry Putty
Concerning the last actions in a task and discovering my container of putty as dry as the Serengeti and hard as a rock is discouraging. My option is to eliminate the putty with a screwdriver and knead it with canola oil up until it’s a functional consistency. The putty isn’t rather as excellent as brand-new, however it operates in a pinch. It’s an unpleasant task, so use latex gloves.– Richard Ryder Take A Look At all the PVC hacks you have actually ever wished to see.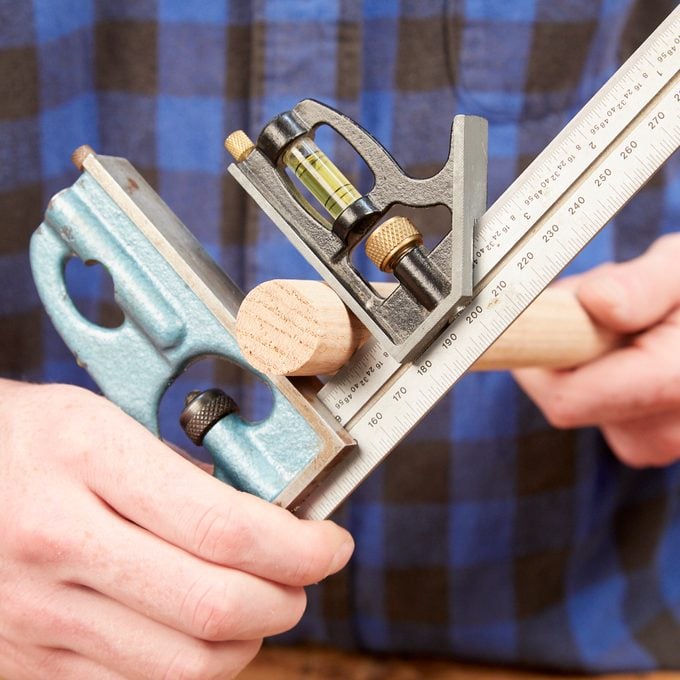
Ad-Hoc Micrometer
Determining sizes can be challenging. Sure, it works OK to simply determine completion, however if you require precision, here’s my technique. Take apart among your mix squares and move the head to another square so that the straight edges are dealing with each other. Set among the square heads at an even measurement and after that move the other head up until both are touching the part you’re determining. Check out the measurement straight off the ruler! Here are 20 more determining hacks include DIYers need to understand.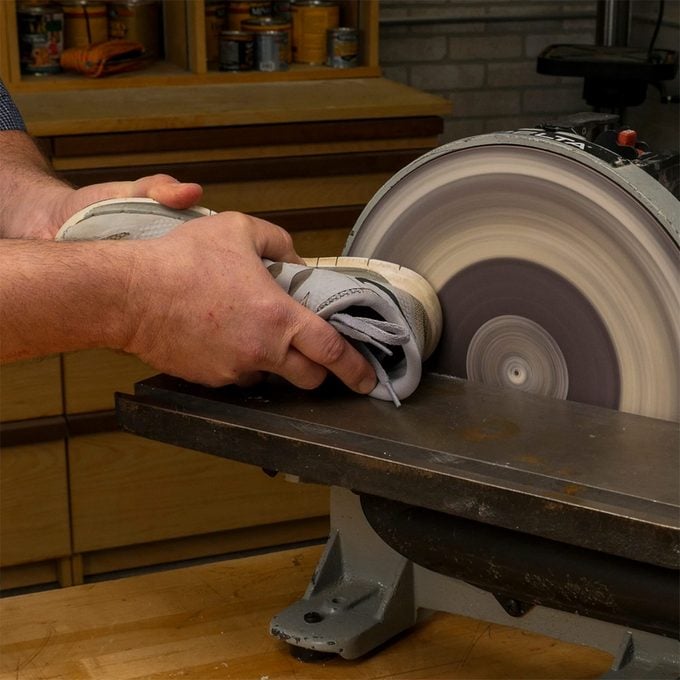
Utilize a Tennis Shoe to Tidy Sandpaper
Make sandpaper almost brand-new once again with a lowly old tennis shoe. Launch your power sander and dust collection system (keep in mind to use hearing and eye defense). Then gradually push the rubber sole of an old tennis shoe along the sandpaper– you’ll see a distinction quickly!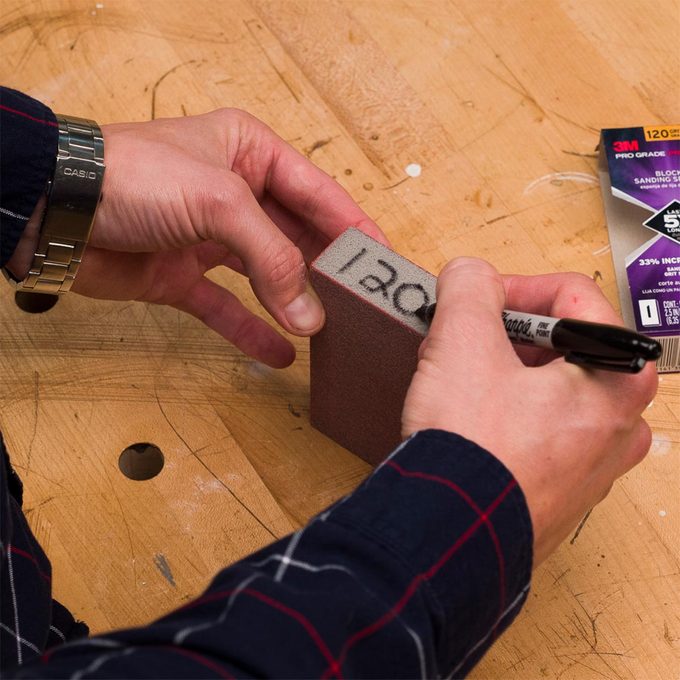
Sanding Sponge Grit Label
When you split open a brand-new sanding sponge, do not discard the product packaging! Well, a minimum of not up until after you compose the grit number on the sponge with irreversible marker. That method, you’ll understand which sponge to grab throughout future sanding tasks.
Copying Cuts
When I require a simply a couple of boards cut to the exact same length, rather of establishing a stop, I utilize the very first board as a design template. Simply set it on top of the next piece, line up completions, slide the design template piece versus the blade and cut.– Brad Holden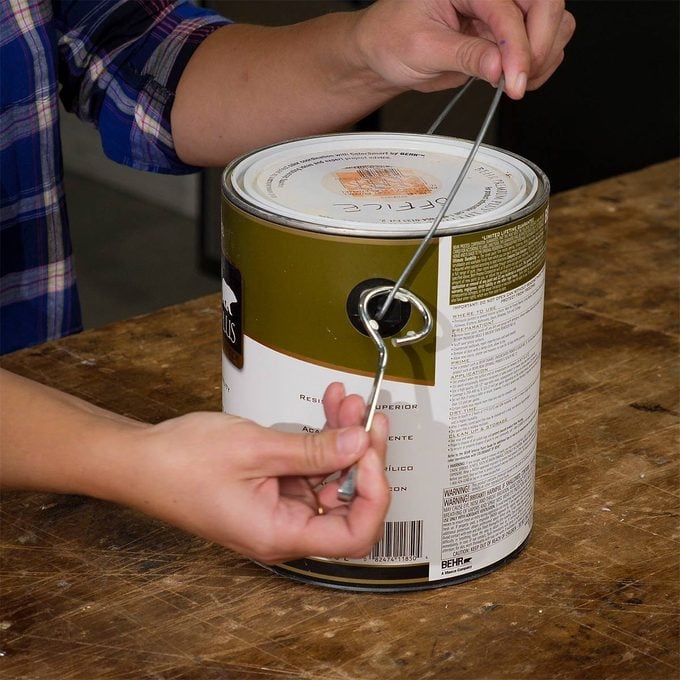
Paint Can Opener on Hand
Constantly have a paint can opener on hand when you’re all set to begin a painting job. Usage pliers or a multitool to somewhat flex open the loop of the opener. Then hook it onto the manage of the paint can you simply bought.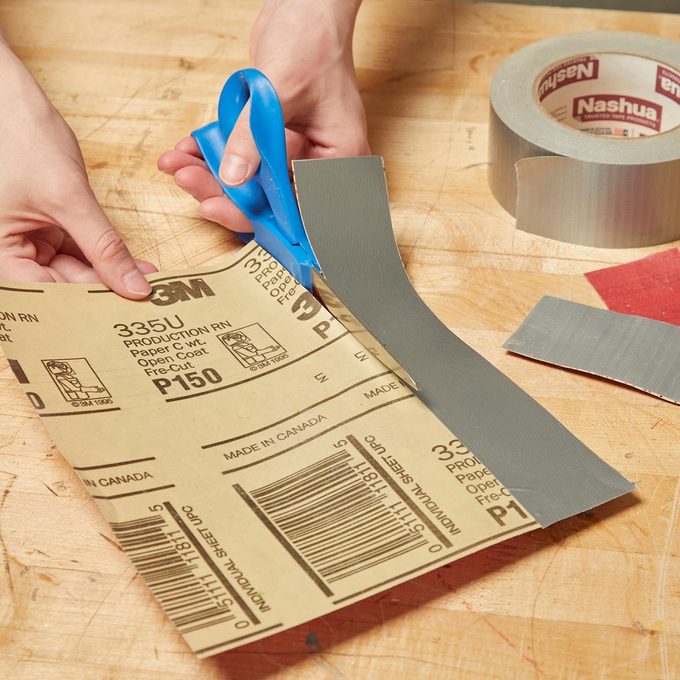
Super-Strong Sandpaper
” I do a great deal of finish-sanding freehand, without a sandpaper block, so I can smooth edges and enter into nooks and crannies. However the finer grits are normally bonded to thinner paper and, a minimum of for me, the paper is too thin and winds up tearing long prior to the grit breaks. So I use duct tape to the back of the sandpaper. The sandpaper is still versatile adequate to sand a tight radius and it’s much more long lasting. You can utilize this super-strong sandpaper like a shoeshine rag.”– Chuck Merchant
Remove Conserving Tape
Cutting with a jigsaw triggers nasty remove in plywood. To restrict remove when eliminating little shapes, I cover the entire work surface area with masking tape and draw the shape onto the masking tape prior to cutting. Absolutely nothing gets rid of remove entirely, however this significantly lowers it.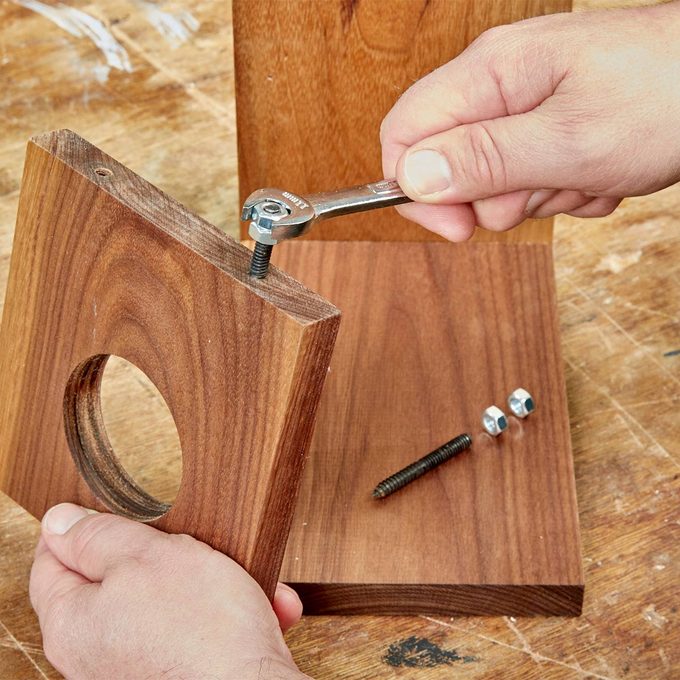
Bolt Head Hack
Make a bolt head for any threaded rod by locking 2 hex nuts together. Then you can utilize a nut motorist or wrench to turn the threaded rod or screw in fasteners such as wall mount bolts.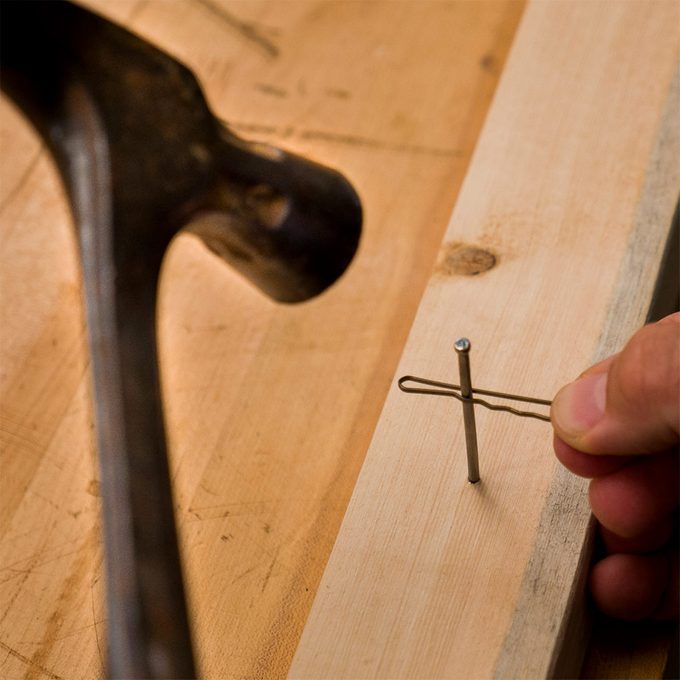
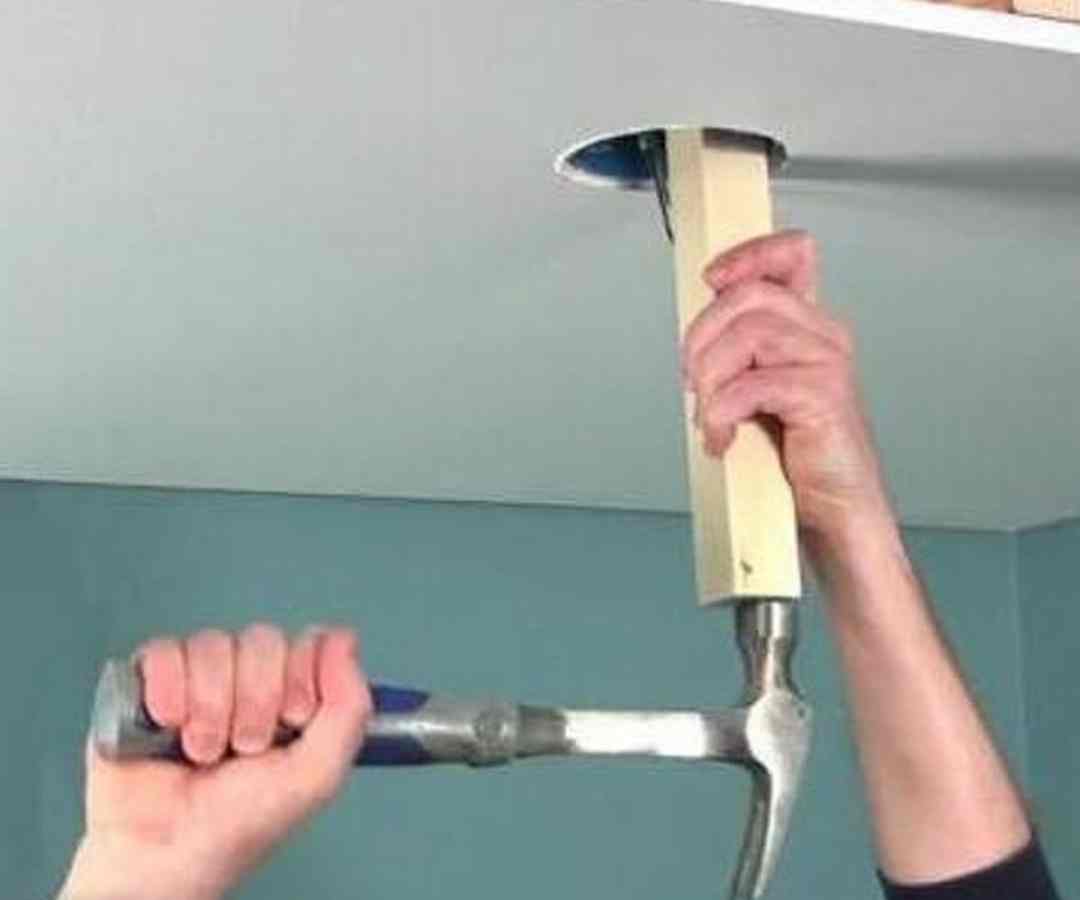
Hairpin Nail Holder
There’s no requirement to run the risk of hammering a finger when dealing with small nails or in tight quarters. A typical hairpin makes an excellent nail holder– and keeps your fingers at a safe range! When the nail is begun, eliminate the hairpin and continue hammering away.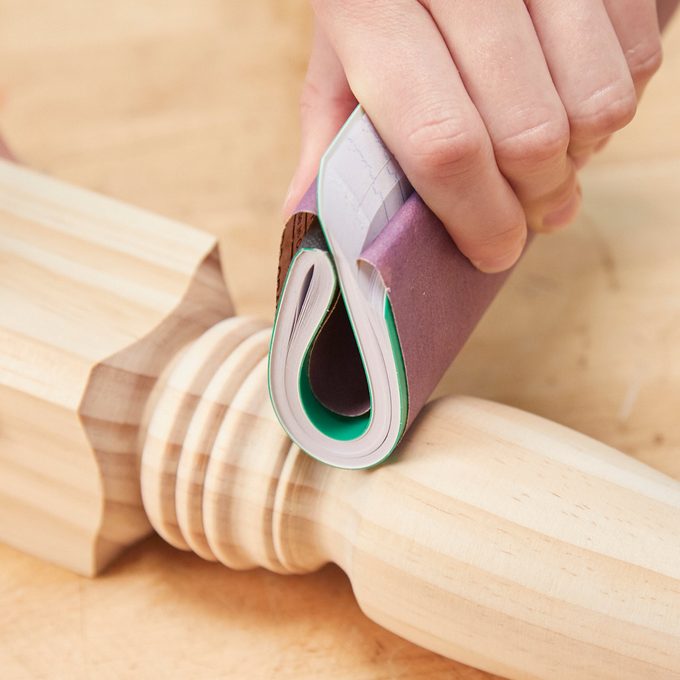
Do It Yourself Flexible Sanding Block
Sanding curves is challenging. Often you require a sanding pad that’s both company and versatile. A little note pad works excellent. Simply cover sandpaper around the pad and flex the pad to whatever arc you require. The next time you are dealing with a woodworking job that has curves and difficult to reach areas, utilize a note pad as a versatile sanding block. Household Handyman
Magnetic Broom
When you spill screws, nails, brads or other little metal parts on a dirty store flooring, select them up in seconds, minus the dust. Screw a 3-in. dia. pot magnet on completion of a wood dowel to produce your ‘picker-upper.’ To utilize this tool, position an inside-out sandwich bag over the magnet and begin sweeping the location. The hardware will jump as much as the effective magnet as you ‘sweep’ the flooring. To discharge and bag the metal pieces in one fast action, simply pull the bag off the magnet. For another creative usage for magnets, take a look at this restroom storage job.
Trigger-Style Bench Clamps
Trigger-style bar clamps make best workbench hold-down clamps. Initially, punch out the split-tube stop at the end of the clamp’s bar and after that move the trigger avoid. Slip the bar through a bench-dog hole and re-install the trigger head. If your bench does not have pet holes, simply drill a hole any place you require it.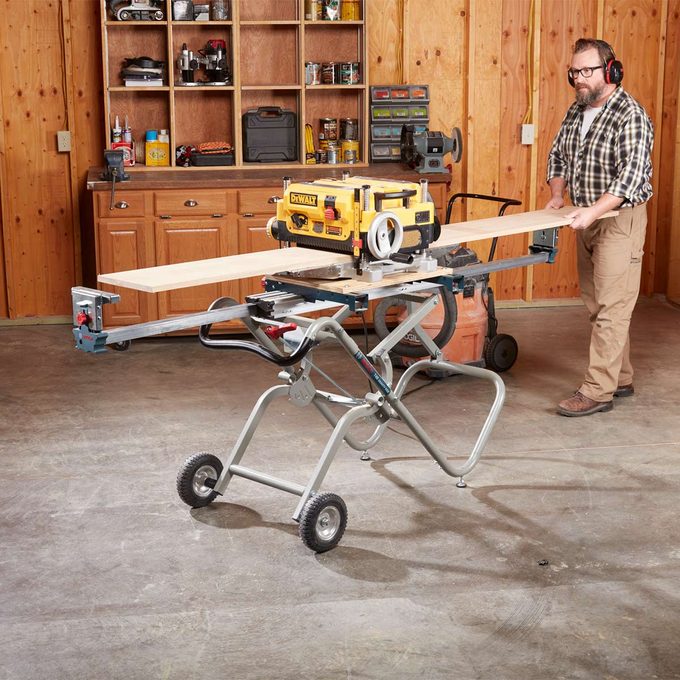
More Planing, Less Workout
Planing boards with a portable planer can supply you with a great deal of workout. However instead of ranging from the infeed side to the outfeed side prior to the board turns your portable planer, attempt this rather: Connect your portable planer to a board; then secure the board to a miter saw stand. Then planing boards will not use you out so rapidly!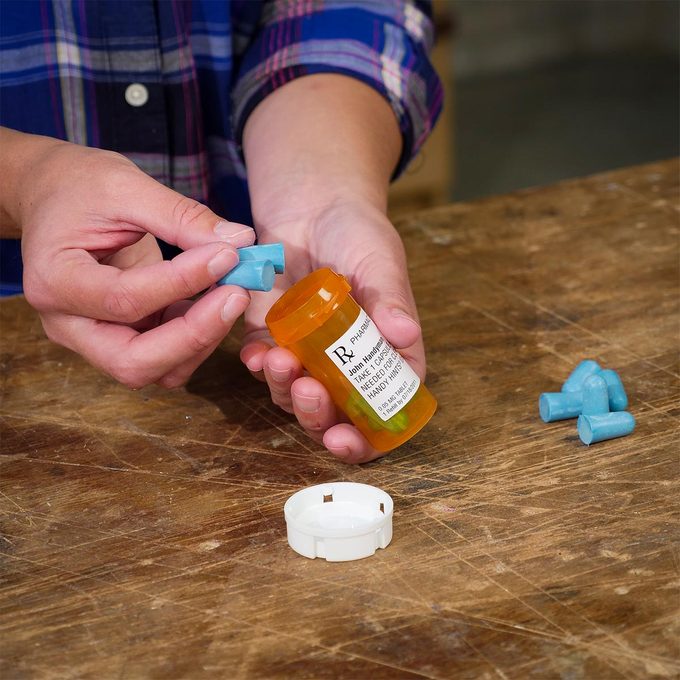
Rx Bottle for Earplug Storage
After losing the storage tube that his pack of earplugs included, Mike Yalch found an option: an empty medication bottle. It keeps his ear defense tidy and on hand at all times, as the little container fits completely in his pocket.
Cut From Both Sides
When I’m on a jobsite where time is cash and I require to make a couple cuts on the miter saw I determine my cuts from both ends of the board. I just require to secure my measuring tape and pencil when. Throughout a day, that time conserved builds up.– Travis Larson Household Handyman
Instantaneous Hardware Patina
I have actually discovered that utilizing weapon bluing ($ 10/3 oz. at sporting products shops) offers off-the-shelf hardware an appealing, aged patina. Merely dip nuts, bolts, washers or other hardware in a cup of weapon bluing. When the hardware turns black, wash it with tidy water and dry it with a paper towel. Make sure to use rubber gloves and eye defense.
Makeshift Countersinking Pointer
Attempt this ’em ergency’ method for drilling countersink holes for screwheads in softwoods like pine, cedar and redwood. A 3/8-in. twist drill bit– spun in reverse on sluggish speed– will bore a clean-edged countersink hole without getting and tearing. Since the drill cuts gradually, you can quickly manage the countersink depth.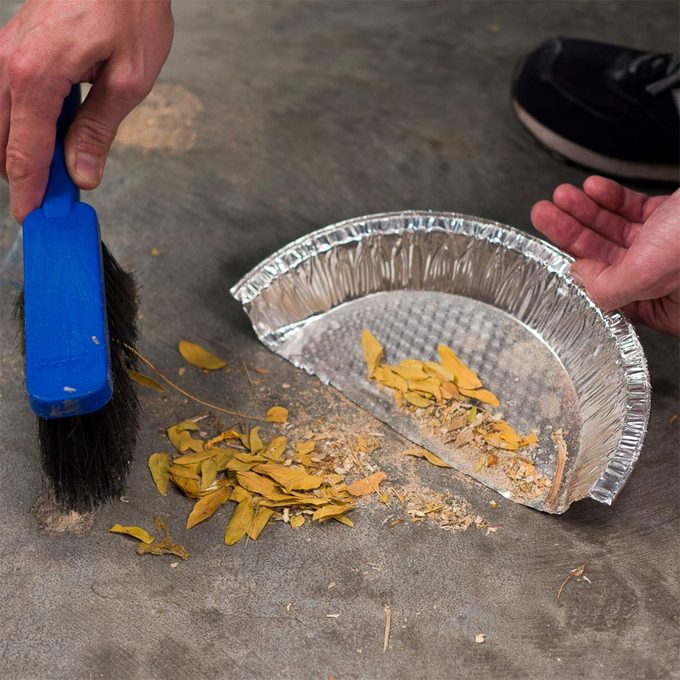
Pie Plate Dustpan
Produce a fast non reusable dustpan out of an aluminum pie plate. Usage tin snips or durable scissors to cut the pie plate in half. Sweep up the mess and toss it in the garbage! Household Handyman
Stay-Put PVC Pipeline Cutter
Here’s an awesome method to cut PVC pipeline on the fly. Simply make a number of notches in the top of a 5-gallon container. Set the pipeline in the notches and you have actually got a steady area for sawing. As a bonus offer, you can pack up the container and bring your tools along, too! For 33 innovative methods to utilize PVC pipeline, take a look at this collection of ideas.
Shop-Made Finishing Helpers
Sick of waiting on surface to dry on one side prior to ending up the opposite? You can buy standoffs, however it’s likewise truly simple to make them yourself. Merely drive 2-in. drywall screws through 2-in. x 2-in. squares of 3/4-in. thick stock. The screw points will leave a divot in the surface that can be retouched later on, however I constantly let the rear end of my job rest on the screws while the surface dries.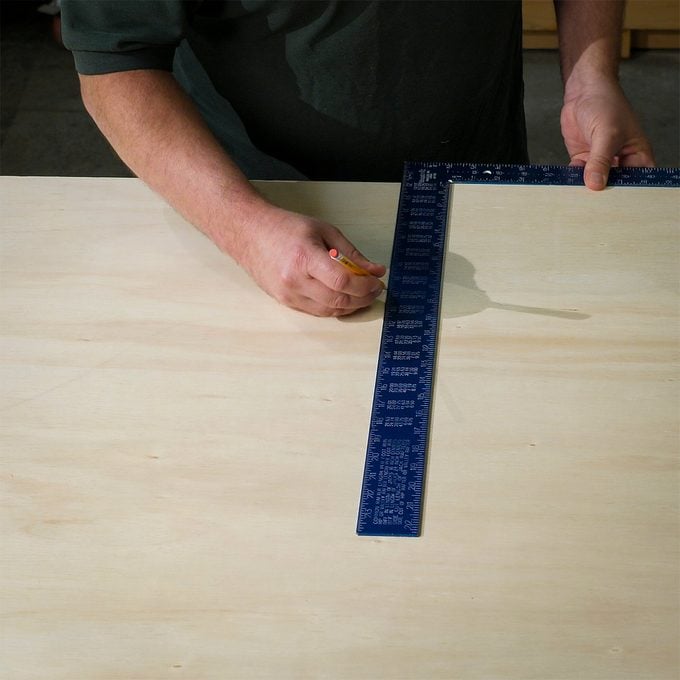
Inspect if a Square is Square
Follow these easy actions for guaranteeing that your square is square: Line up the brief side of the square with the factory edge of a piece of plywood. Draw the line along the edge of the long side of the square. Turn over the tool and line up the base of the mark with the exact same edge of the long side of the square. Draw another line. If the marks do not line up completely, the square is not square.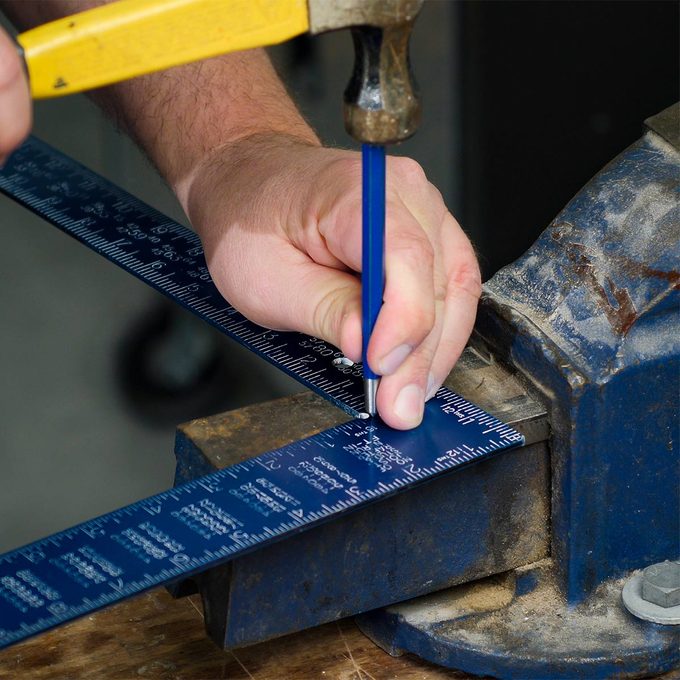
How to Repair a Square
Prior to tossing your off-kilter square and investing cash on a brand-new one, attempt repairing it with this easy procedure. Utilize a center punch, a hammer and an anvil. If the sides of the square are too close together, punch the inner corner. If the sides are too far apart, punch the external corner. Inspect your development, and repeat as required up until the square is square.
Little Components Jointer
Here’s a method to joint or shape work pieces that are too little to keep in a vise. Turn a hand aircraft upside down and secure it in your bench vise. Now you can pass the wood over the aircraft to joint the edge.
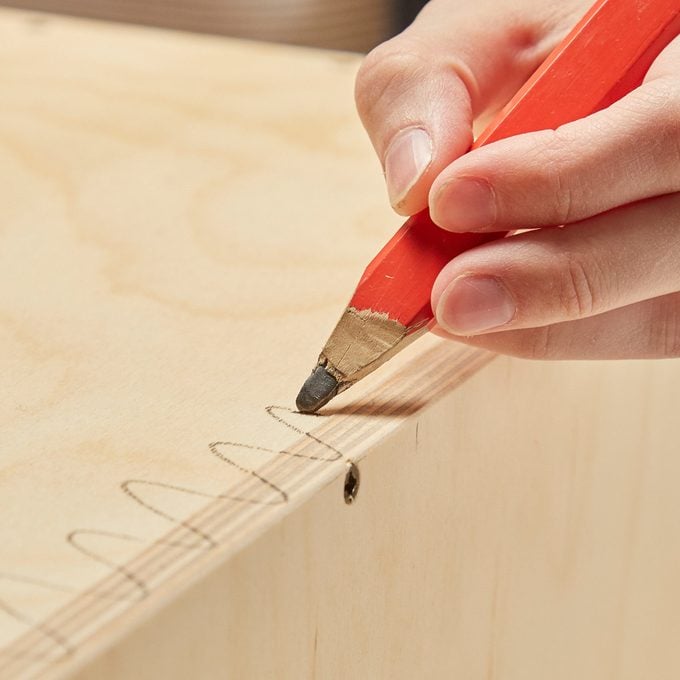
Visual Help for Sanding Even Surface AreasWith an orbital sander and excellent sandpaper you can smooth wood uniformly and quickly with top-notch outcomes. When flush-sanding strong edge-banding, draw a squiggly line throughout the joint prior to sanding. The edge-banding will be somewhat happy with the plywood veneer, so the pencil marks supply a visual help to make certain that you’re sanding flat, which you do not sand through the plywood’s veneer. As you go, you can likewise evaluate for a smooth, level shift by carefully scraping your fingernails versus the shift. If it’s smooth, your fingers will not capture on the joint in between the 2 pieces. |
 Household Handyman
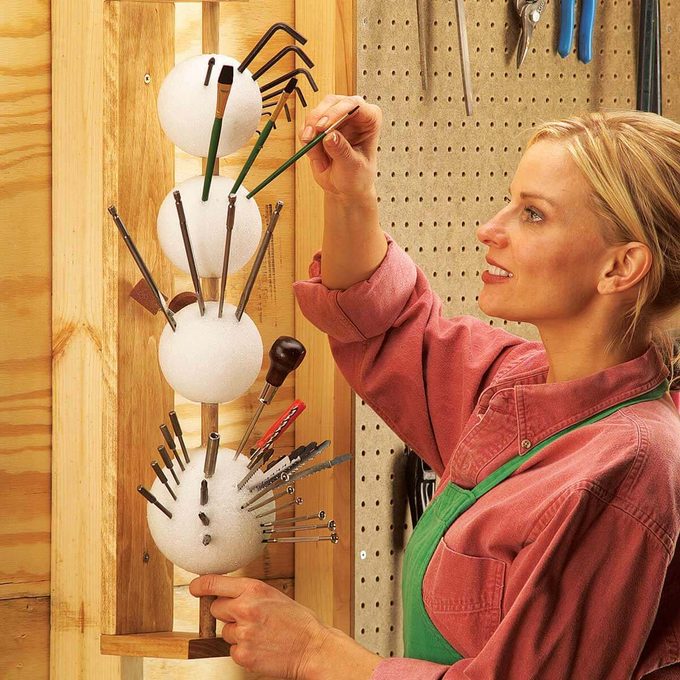
Foam Ball Tool Storage
Here’s a guideline on keeping pointed tools for instantaneous schedule. Drill 5/8-in. holes through a couple of 4- or 5-in. foam craft balls (offered at craft shops), and skewer and glue them along a 5/8-in. dia. dowel with building adhesive. Screw together a 3/4-in. wood bracket, drilling a stopped 5/8-in.- size hole 1/2 in. deep in the bottom end and a 3/4-in. hole through the upper end. Screw the bracket at a practical height, slide in the foam balls and pack them with drill, router and spade bits; paint brushes; screwdrivers; Allen wrenches; awls; X-Acto knives; pencils and, well, you understand.
Procedure When, Cut 10 Times
If I’m cutting a lot of boards to approximately the exact same length, I mark them all at the exact same time. With every mark, I include 1/8 in. to permit the blade density. For instance, if I’m cutting 12 in. boards, the very first mark is at 12 in. The 2nd is 12-1/8, the next one is 12-1/4, then 12-3/8 and so on. I do not utilize this technique for accuracy, however is an excellent method to conserve a long time on the task website.– Travis Larson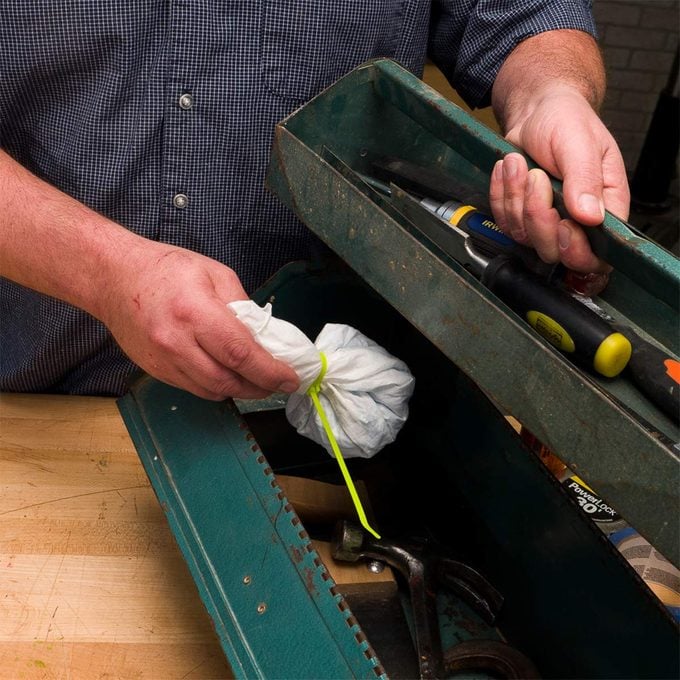
Cat Litter Pouch for Tool Security
Make a rust-preventing pouch for your tool kit with a scoop of silica crystal cat litter, a piece of breathable material and a zip tie. Toss it in your tool kit to stay out excess wetness and safeguard your valued ownerships.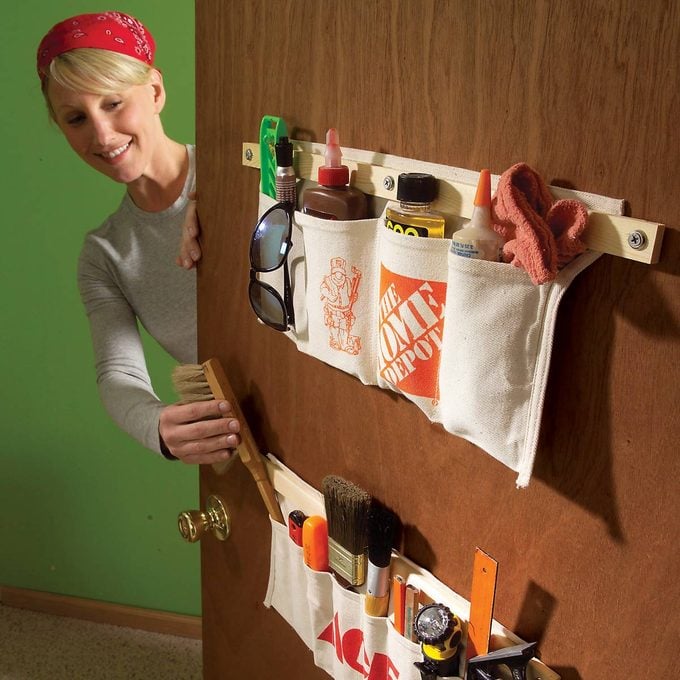 Household Handyman
Behind the Door Storage: Tool-Apron Storage
Tool aprons can be customized to keep almost any family product. Simply stitch a range of pocket widths in the aprons, then install the aprons by screwing a wood strip through the top of each and into a door. For hollow-core doors, utilize hollow anchor fasteners to hold the screws securely to the door.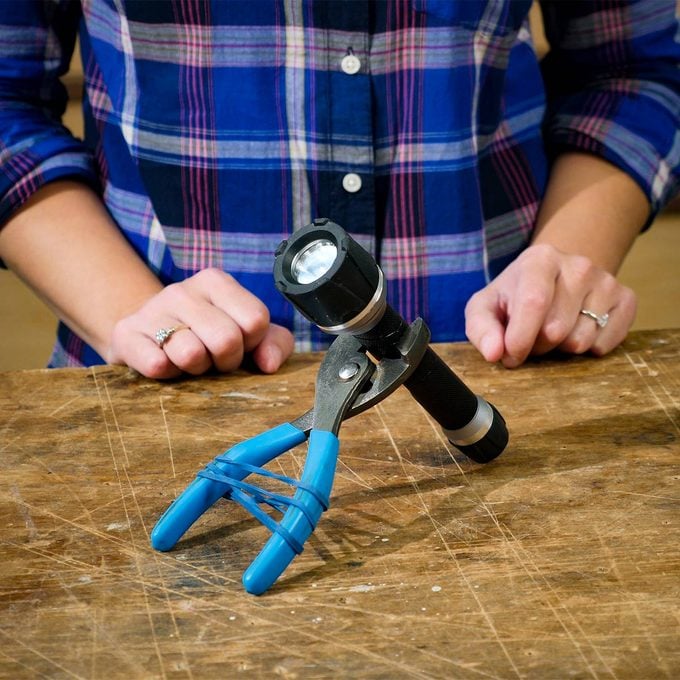
Hands-Free Light Hack
Make a hands-free light in a breeze with a flashlight, a set of pliers and an elastic band. Location the flashlight in the jaws of the pliers; then cover an elastic band around the deals with of the pliers. That’s it! Point the light any place you require it.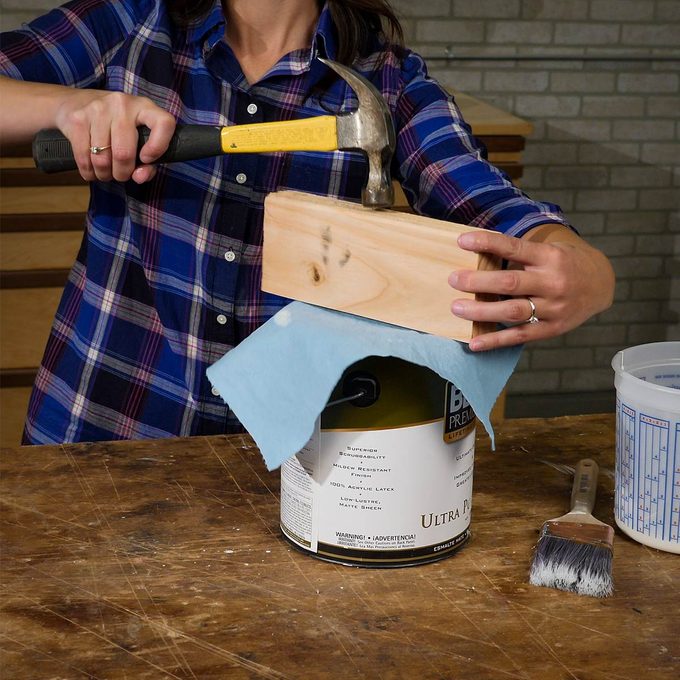
Close Paint Cans with Less Mess
Stop paint splatter when you re-seal a paint can cover by covering it with a rag or paper towel. Then position a wood block simply bigger than the size of the paint can throughout the cover and hammer the center of the block. Turn the block a couple of times, hammering the center each time, to seal the cover without harming the top of the can.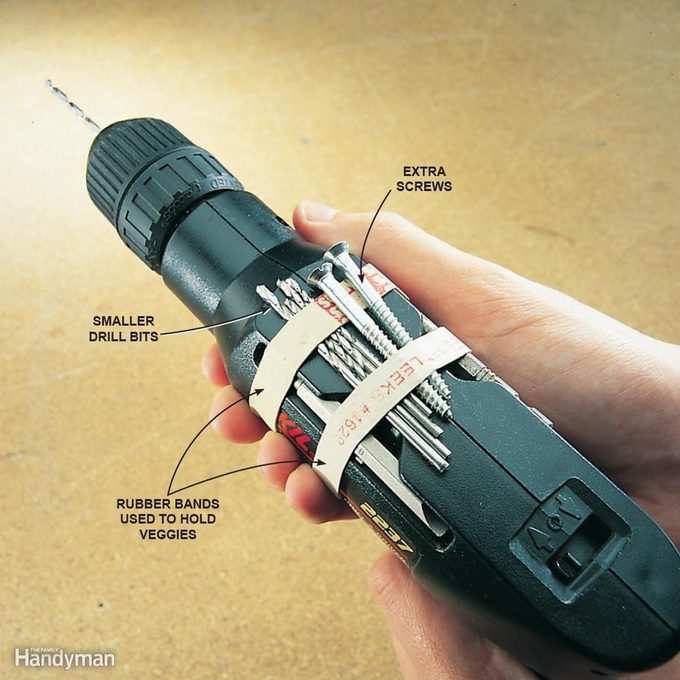 Household Handyman
Drill Bit Girdle
Conserve those large elastic band that are twisted around broccoli and other veggies and extend them over your electrical or cordless drill. Utilize them for onboard storage of smaller sized drill and motorist bits and screws.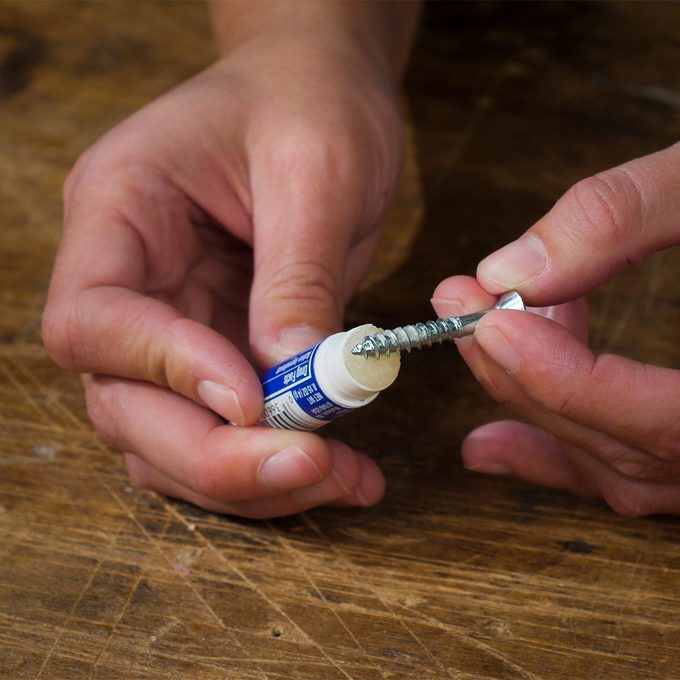
Chap Stick for the Tool Kit
If you take pleasure in dealing with woods, you understand how essential it is to oil screws. It’ll make driving the fasteners simpler and lowers the quantity of heat produced. However what if you do not have a bar of soap or a stack of beeswax close by? Grab your tube of Chap Stick! The lip balm does a great task of lubing screws– and it suits your pocket. Household Handyman
Bungee Cable Organizer
Flexible cables can rapidly end up being a twisted mess. Discover the one you require at a look with this useful rack made from 3- or 4-in. PVC pipeline. Simply drill 1/2-in. size holes in the pipeline to match the somewhat extended lengths of your cables. Keep it in your trunk or store, out of the reach of kids.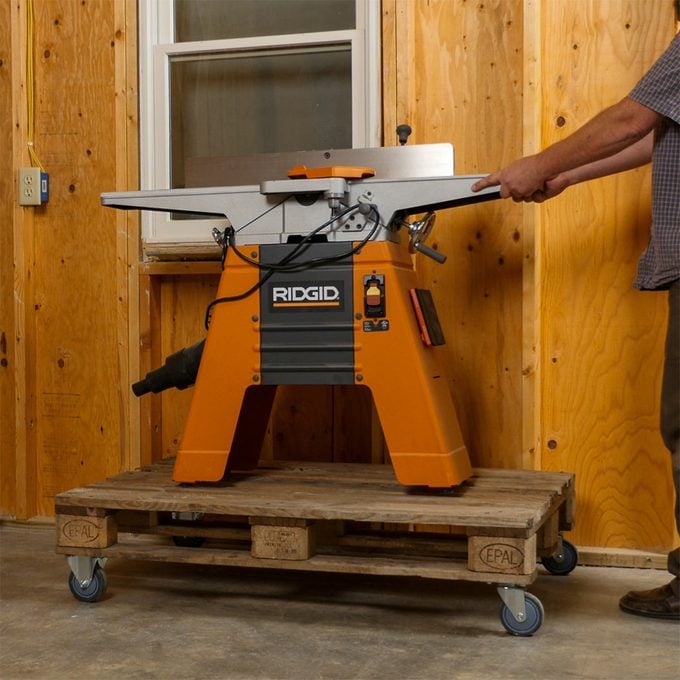
Pallet Dolly
This easy and economical hauler is best for transferring loads of lumber or heavy tools around the workshop. Include a little bit of support to the pallet initially; then set up 4 rotating casters, one at each corner. You’ll question why you didn’t make a pallet dolly earlier! Household Handyman
Moisturized Wood Putty
Wood putty is frequently a one-time usage item for me. Prior to I even think of utilizing it a 2nd time, it’s dried. The technique I discovered was to fill an empty paint can with water and shop all my putty containers immersed so no air can get in. Now I can lastly state that I have actually seen the bottom of a putty container.– Kim Boley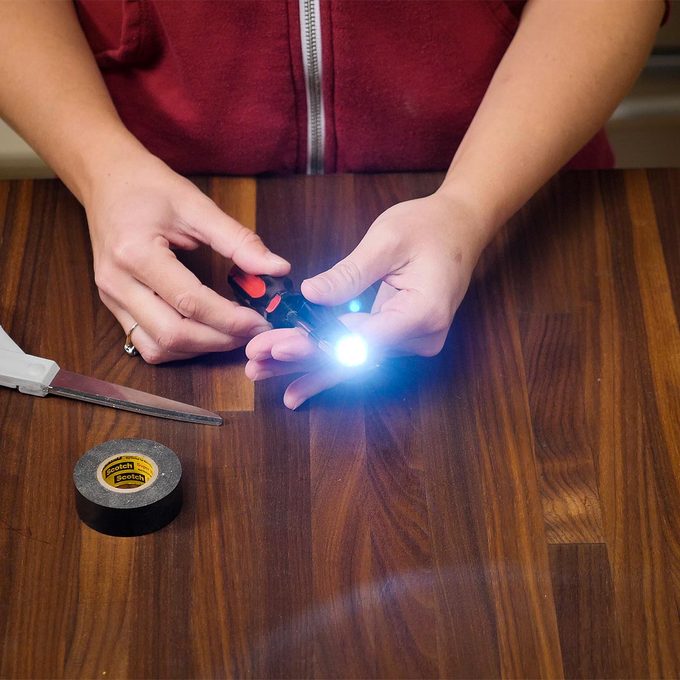
Lighted Screwdriver Hack
No requirement for expensive hand tools with integrated LED lights, go with this lighted screwdriver hack rather. When operating in a dark area such as inside a cabinet, make your own lighted screwdriver by taping a keychain-size flashlight to the shaft. It’ll shine the light right where you require it.
In-the-Bucket Air Tools
A 2-1/2- gallon container is all you require to keep air tools and pipes on a wall right by the air compressor. Screw a 3/4-in. plywood rack inside the container to produce 2 storage locations, then connect the container to the wall with a number of lag bolts and washers. Load up the container with nailers, nails, tire pressure determines and other devices and coil the tube around it. Take a look at more tool storage ideas.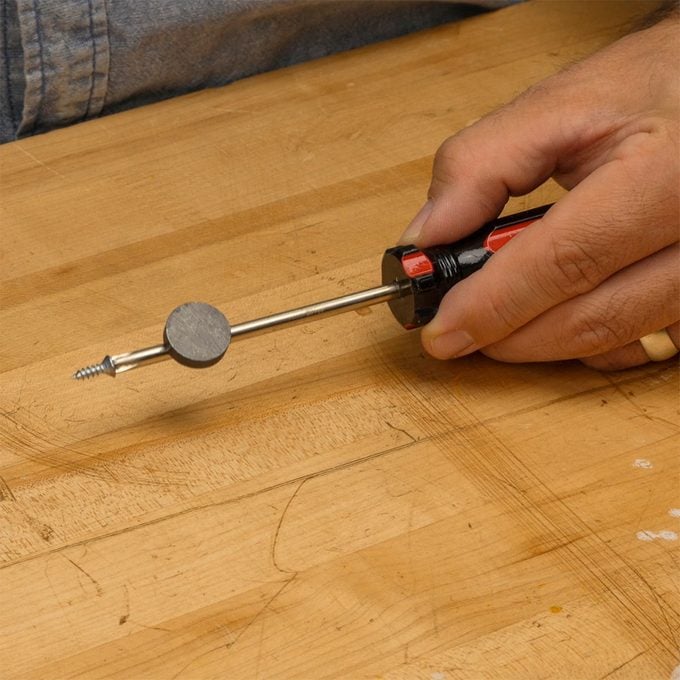
How to Allure a Screwdriver
Allure completion of a screwdriver to drive screws with simply one hand. This tip is specifically helpful for operating in tight areas where there isn’t space for you to hold a screw with one hand while you turn the screwdriver with the other.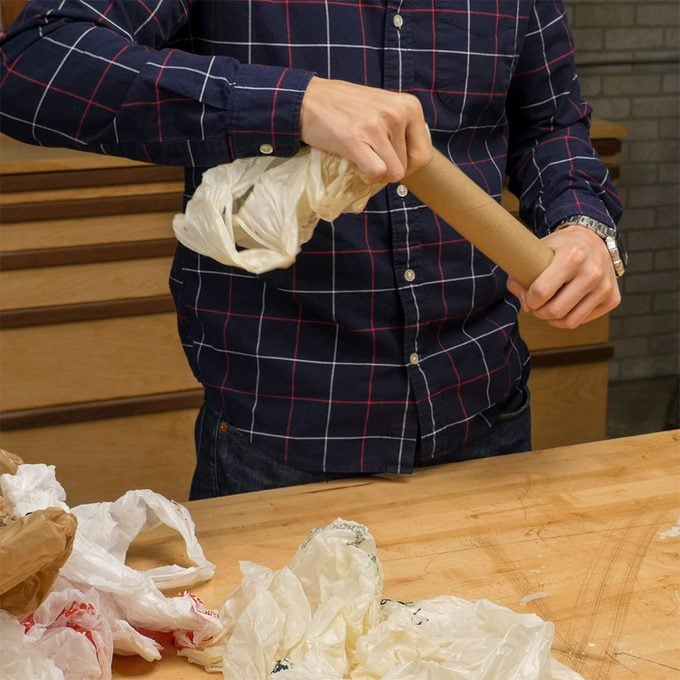
Paper Towel Roll Bag Storage
There are numerous usages for plastic grocery bags in the workshop. You can utilize them to seal up brushes and rollers throughout a painting job, so you do not need to clean a lot things in between coats. The point is, it deserves keeping a handful of plastic grocery bags on hand in the workshop, and here’s an excellent suggestion for keeping them: Things as numerous plastic grocery bags as possible into an empty paper towel roll. Then toss the roll in a drawer or cabinet. The cardboard tube keeps the bags consisted of, and it’s simple to pull one out at a time when you require it. Take a look at more house hacks utilizing cardboard tubes.
Inexpensive Zero-Clearance Miter Saw
When offcuts fall under the miter saw’s throat plate, they end up being projectiles. When the offcuts are really the ended up pieces– like these thin rollercoasters– it’s not just unsafe it’s frustrating! My option is to position a couple layers of tape over the saw’s throatplate and cut a kerf. My parts no longer go air-borne and it offers me an excellent location to mark cut lines.– Will Leighton
Helpful Rag Cutter
Quickly cut up old tee shirts and towels to utilize as store rags with this easy cutter: Secure a sharp energy knife in a vise and begin cutting the product. Continue cutting or tear the product into the preferred shapes and size.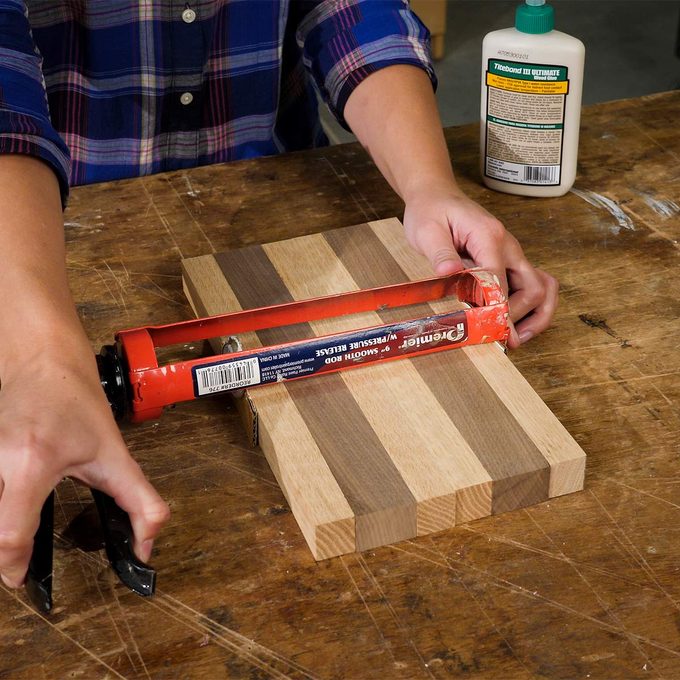
Caulk Weapon Clamp
Did you understand that you can utilize a caulk weapon as a clamp? It’s best for gluing up little tasks such as a cutting board. Simply position a number of pieces of scrap wood or cardboard at the ends of the caulk weapon and after that squeeze the trigger to use pressure.
Paper Towel Holder Tape Storage
Instead of use up area in a drawer or cabinet for keeping rolls of tape, install an old paper towel dispenser to your wall or pegboard. It can hold numerous rolls of duct tape, painter’s tape, and so on, within simple reach. And unlike stowing away tape in a dark cabinet or confined drawer, the paper towel holder makes it truly simple to discover the particular tape required for various tasks. A dowel-style paper towel holder created to sit on top of a counter top would likewise work for confining rolls of tape. And it’s portable, so you might take it with you for painting and repair work tasks around your home.
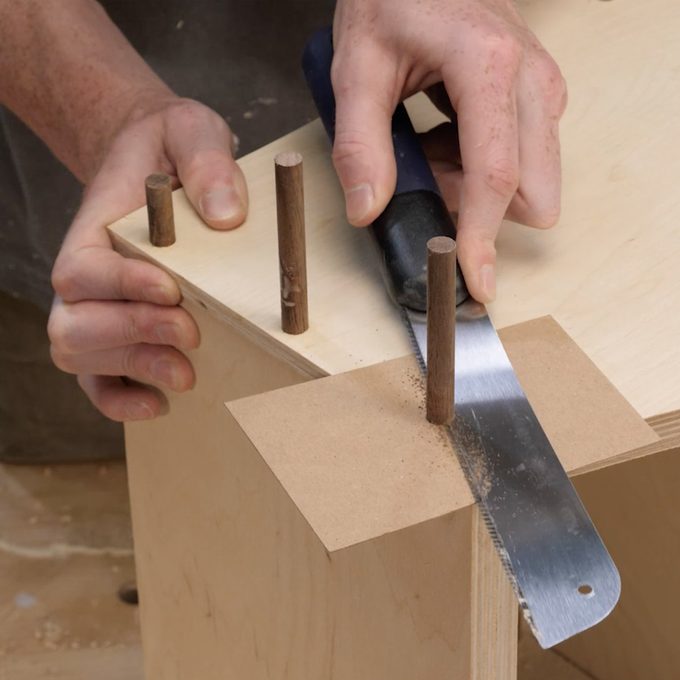
Flush-cut GuardEven when utilizing a flush-cut saw I take safety measures to conserve wood surface areas from spoiling. My technique for cutting dowels is to cut a hole in a slice of cardboard or plastic and fit it over the dowel. In this manner the blade never ever touches the wood. The staying dowel sands flush in a breeze.– Brad Holden |
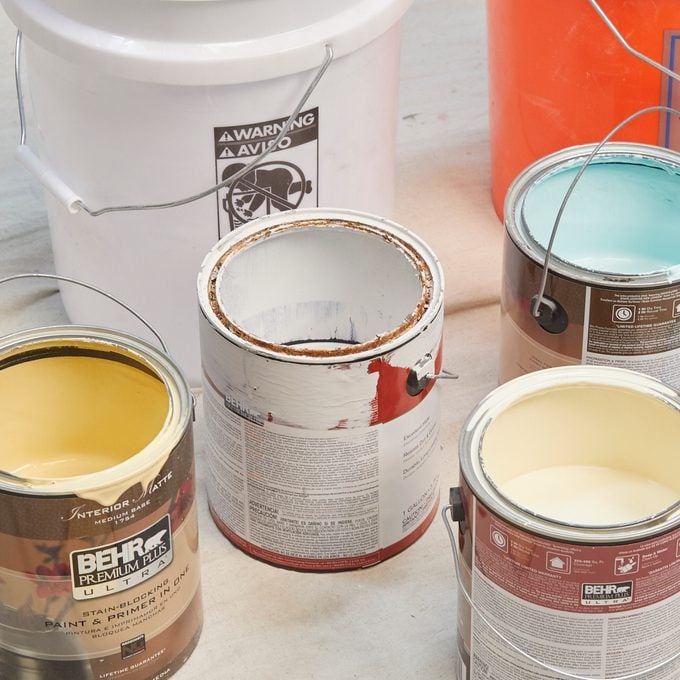
Leftover Paint Mixing
I have numerous rental residential or commercial properties that look like they’re constantly in requirement of repainting. Rather of tossing out remaining paint, just needing to purchase more later on, I put it to utilize. I take numerous cans of interior latex, partly utilized paint and guide, any shine, any color and blend them entirely. It does not matter just how much scrap or particles remains in the paint. Simply put everything in. I utilize a power mixer to mix them, and after that dispose all of the mix into a larger container. I did twenty gallons of paint when utilizing a huge round plastic tub. After all the various paints remain in the “barrel” are combined, it normally winds up an off-white or antique white. The shine is normally an eggshell to satin. If the color is too loud, I tone it down by including a can of white paint. Now, I put the paint into 5-gallon containers with strainer bags inside. Raise out the strainer bags to eliminate any particles and pop on a cover to keep the paint fresh. This is an excellent method to consume leftovers when you do a great deal of painting. — Spike Carlsen. Plus: Take a look at 11 more painting hacks from our specialist field editors.
Tape-Tearing Pointer
Here’s a simple method to tear tape and get a beginning edge at the exact same time. Merely fold the tape under at a 90-degree angle to the roll. Then, with a snapping movement, pull the tape versus the edge of the roll. The tape tears, leaving a triangular beginning tab. This will not deal with plastic tapes; those should be cut.– reader Chris Henrichs. Plus: How to Tape Drywall